Installing a Standpipe: A Step-by-Step Guide for DIY and Professionals
Reliable outdoor water access is essential for construction sites, gardens, allotments and farms. A standpipe provides a secure and convenient way to deliver water exactly where it is needed. Whether you are a DIY enthusiast or a professional contractor, installing a standpipe correctly is crucial to ensure long-lasting performance and prevent leaks or water damage. In this guide, we will cover everything you need to know about installation including preparation, tools, installation steps and maintenance tips.
Get in touch with our team for unique applications.
What is a Standpipe
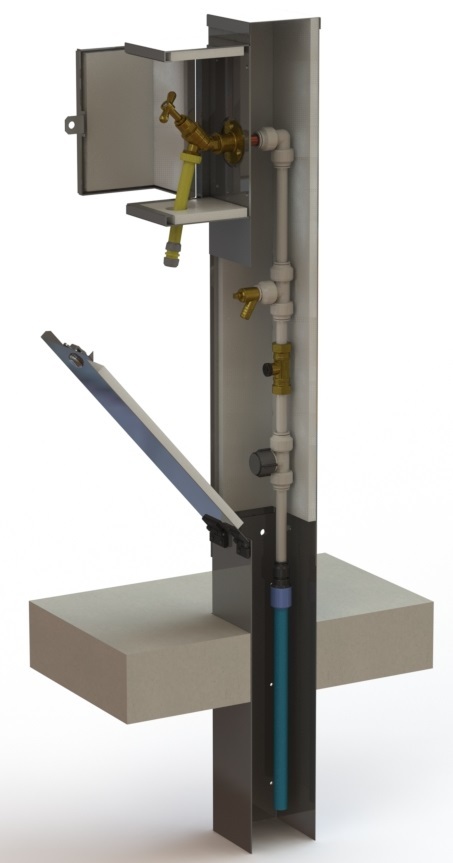
A standpipe is a vertical pipe that delivers water from the main supply to an outdoor tap. Standpipes can be above ground or below ground depending on your site needs. They are commonly used on construction sites, allotments, farms, gardens and other outdoor areas where water is needed regularly. Using a secure standpipe also protects your water supply from tampering and theft.
Tools and Materials Needed for Standpipe Installation
Before starting the installation, gather the following items:
-
Standpipe kit (above or below ground)
-
Pipe wrench or spanner
-
Pipe fittings and connectors
-
Drill with masonry or wood bits if required
-
Shovel or post hole digger for below-ground installation
-
Level
-
PTFE tape for sealing threaded joints
Step by Step Guide to Installing an Above Ground Standpipe
-
Choose the Location: Pick a flat and accessible spot near your water source. Ensure the area is safe and there is enough space for connecting hoses or taps.
-
Prepare the Ground: Clear debris and level the surface where it will be installed.
-
Attach the Base Plate: Secure the base plate using screws or bolts if provided in the kit. Make sure it is level.
-
Connect to Water Supply: Use the appropriate fittings to connect the standpipe to your main water line. Apply PTFE tape to threaded joints to prevent leaks.
-
Install the Tap: Fit the outdoor tap to the top of the standpipe. Check that it opens and closes smoothly.
-
Test for Leaks: Turn on the water supply and inspect all joints. Tighten connections if necessary.
Installing a Below Ground Standpipe
-
Mark the Position: Identify where the standpipe will go and mark the spot for digging.
-
Dig the Hole: Ensure the hole is deep enough to accommodate frost protection and base support.
-
Place the Standpipe: Position the standpipe in the hole and connect it to the water supply line. Use sand or gravel to stabilize the pipe base.
-
Backfill and Compact: Fill the hole carefully, compacting the soil around the standpipe. Ensure it remains vertical.
-
Install Tap and Test: Attach the tap, turn on the water, and check for leaks or misalignment.
Maintenance Tips
-
Inspect taps and joints regularly for leaks
-
In winter, insulate above-ground pipes to prevent freezing
-
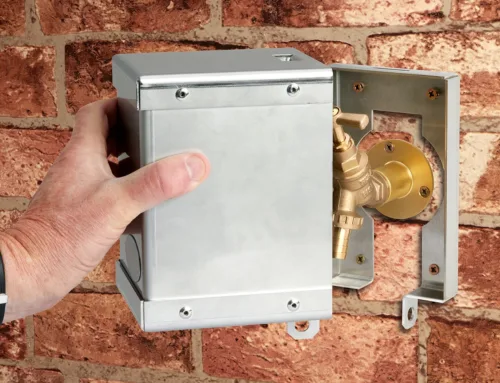
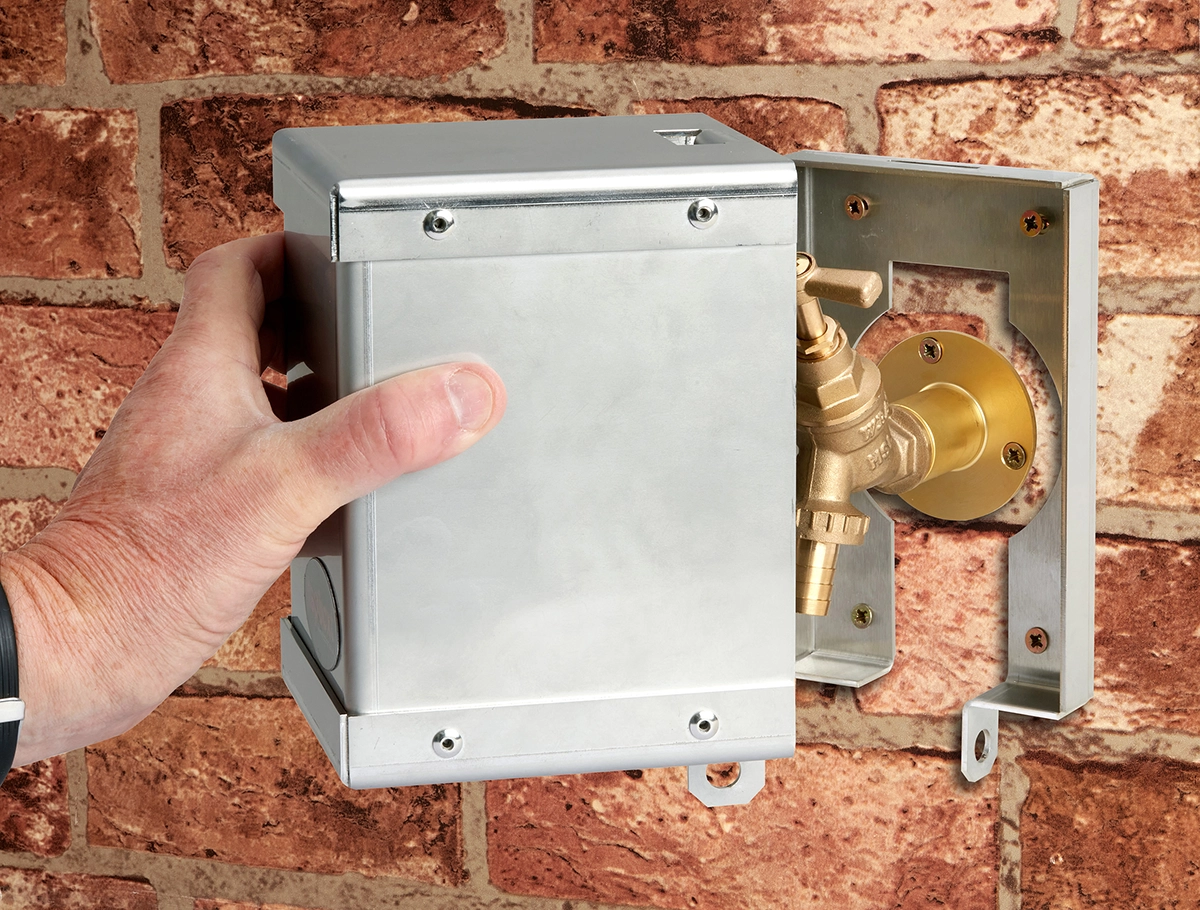
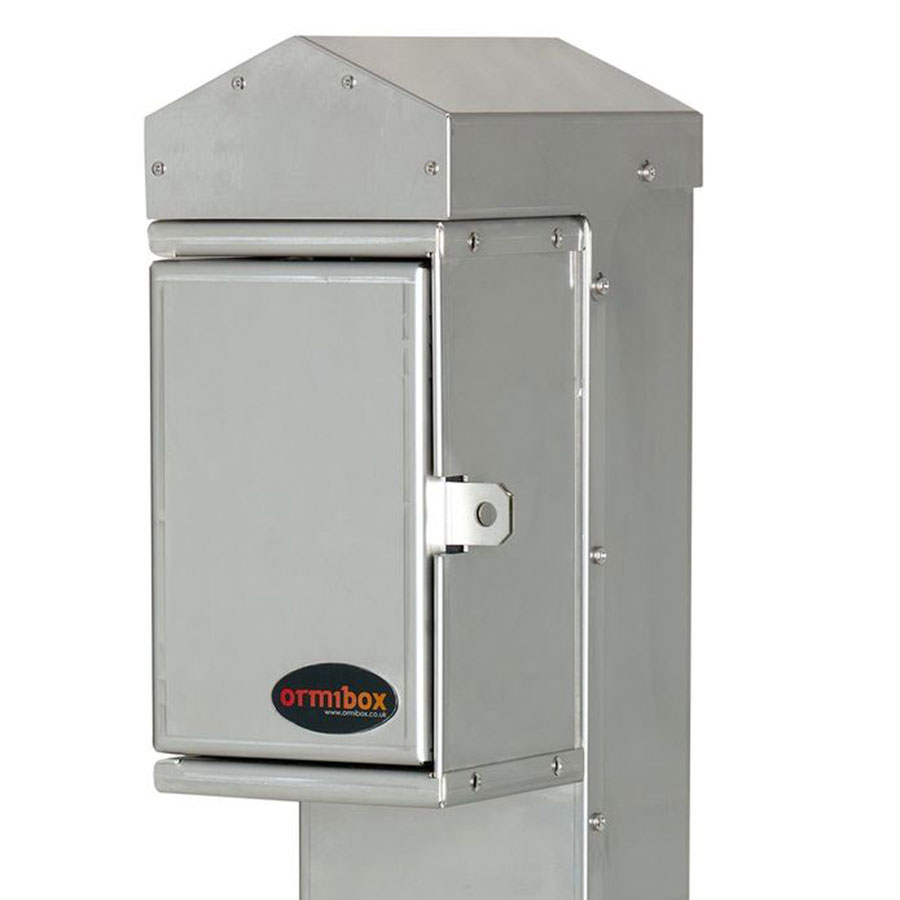
Clean tap boxes and remove debris to ensure security and hygiene
-
Replace worn washers or seals promptly to maintain efficiency
Benefits of Installing a Standpipe
-
Easy access to water for outdoor tasks
-
Secure water supply with lockable options
-
Frost-resistant designs for winter use
-
Suitable for gardens, construction sites, farms and allotments
Installation Made Easy and Secure
Installing a standpipe is a simple but essential step for ensuring reliable outdoor water access. Following this step-by-step guide will help DIY users and professionals install both above ground and below ground standpipes safely and efficiently. Protect your water supply, reduce leaks, and enjoy convenient access to water whenever you need it.


